SVGにCSSやJSを組み込んでローディングアニメーションを作成する!
こんにちは!SDの開発担当のさいとーです!
今回のネタは「SVG」です!
皆さん、SVG使ってますか??
SVG形式の画像って、拡大しても荒くならないとか、ロゴとかによく使われているとか、そういったイメージを持っている方が多いかもしれません。
良く使われているjpgやpngなどの画像形式との比較を簡単にまとめるとこんな感じになります。
| 特徴 | SVG(ベクター画像) | jpgやpng(ラスター画像) |
|---|---|---|
| 長所 | サイズ変更しても画像が荒くならない | 写真など複雑な描写ができる |
| 短所 | 複雑な画像の表現が難しい | 拡大すると画質が落ちる |
| 用途 | ロゴなど単純な形の画像 | 写真など複雑な描写が必要になる画像 |
ここまでは良く目にする特徴かもしれませんが、
SVGはもっと色々なことができます!
この記事では、SVGにCSSやjavascriptを組み込んで「機能を持つSVG画像」を作り、
その機能をHTMLから呼び出す、ということをやっていきたいと思います。
例として、SVG画像でローディングアニメーションを作成してみましょう!
SVGの表示方法
まずはSVG画像の表示方法からご紹介します。
※SVG画像の作り方は本稿ではご紹介しません。ご了承ください。(illustratorなどで作れるので、調べてみてください!)
SVGが画像なので、普通の画像として扱えば表示できます。
例えばimgタグで
<img src="sample.svg" alt="svg画像">
このように表示させたり、
背景画像として
<html>
<head>
  <style>
    .background {
      width: 256px;
      height: 256px;
      background-image: url(sample.svg);
      background-size: 100%;
    }
  </style>
</head>
<body>
  <div class="background"></div>
</body>
</html>
このように表示させたりできます。
しかし上記表示方法では、今回やろうとしている「CSSやjavascriptを埋め込んでHTML側から使用する」ということができません。
SVG画像を「表示」するだけなら上記方法で大丈夫ですが、今回は下記のようにSVGを読み込みます。
<object type="image/svg+xml" data="sample.svg" width="256" height="256"></object>
objectタグを使用します。
こうすることで、SVG画像内に組み込んだCSSやjavascriptをHTML側から使用することができます。
※そのほかにもsvgタグを用いて直接HTMLに画像の内容を書いたりもできますが、HTMLの可読性を損なうのでお勧めしません。気になる方は調べてみてください。
SVGにCSSを埋め込んでアニメーションさせてみよう
では早速SVG画像を動かしていきましょう!
今回アニメーションさせる元の画像はこちらになります。
何も編集していない状態なので、文字がごちゃっとなっていますね・・・
このSVGをテキストエディタで開くと、このような内容になっています。
<svg xmlns="http://www.w3.org/2000/svg" viewBox="0 0 352.74 333">
    <defs>
        <style>
            .ellipse {
                fill:none;
                stroke-miterlimit:10;
                stroke-width:5px;
                opacity:0.6;
            }
            .ellipse1 {
                stroke:aqua;
            }
            .ellipse2 {
                stroke:#f6bbff;
            }
            .ellipse3 {
                stroke:#fff900;
            }
            .text {
                font-size:48px;
            }
            .loading-text{
                fill:#939393;
            }
            .load-complete-text{
                fill:#727272;
            }
        </style>
    </defs>
    <title>Loading</title>
    <ellipse class="ellipse ellipse1" cx="178.74" cy="166.5" rx="146.5" ry="164"/>
    <ellipse class="ellipse ellipse2" cx="178.74" cy="166.5" rx="164" ry="146.5" transform="translate(-59.3 111.68) rotate(-30)"/>
    <ellipse class="ellipse ellipse3" cx="178.74" cy="166.5" rx="146.5" ry="164" transform="translate(-54.82 238.05) rotate(-60)"/>
    <text class="text loading-text" x="89.68" y="178.49">Loading</text>
    <text class="text load-complete-text" transform="translate(0 183.28)">Load Complete!!</text>
</svg>
このコードをコピーして.svgという拡張子で保存して、HTMLから読み込むと先ほどの画像が表示されるはずです。
見てわかるように、HTMLと同じようなDOM構造になっていますね。
ただ、HTMLでは見慣れないタグもあるかと思います。
SVGの中身は、「SVG DOM」というもので構成されています。
「SVG DOM」はDOMレベル1に準拠し、 更にCSSオブジェクトモデルとイベント処理を含むDOMレベル2の多くの機能をサポートしています。
そのため、HTMLで定義されているタグやCSSプロパティは違うものの、HTMLとほぼ同じ方法でDOMを操作できます。
※DOMレベル1やDOMレベル2について詳しく知りたい方はこちらのドキュメントをご覧ください
上記例を簡単に説明すると、
ellipse要素は楕円、text要素は文字を表しています。
fillは塗りつぶしのプロパティ、strokeは線のプロパティです。
このあたりを変更すると、色や線の太さを変えることができます。
HTML、CSSの知識で画像編集ができてしまうので、とても簡単ですね。
それでは早速こちらの画像を編集していきましょう。
まずは文字が重なって見えにくくなっているので、「Load Complete!!」という文字を消してみたいと思います。
SVGの内容を下記のように書き換えてみましょう。
<svg xmlns="http://www.w3.org/2000/svg" viewBox="0 0 352.74 333">
    <defs>
        <style>
            .ellipse {
                fill:none;
                stroke-miterlimit:10;
                stroke-width:5px;
                opacity:0.6;
            }
            .ellipse1 {
                stroke:aqua;
            }
            .ellipse2 {
                stroke:#f6bbff;
            }
            .ellipse3 {
                stroke:#fff900;
            }
            .text {
                font-size:48px;
            }
            .loading-text{
                fill:#939393;
            }
            .load-complete-text{
                fill:#727272;
                /* ここを追記 */
                display: none;
            }
        </style>
    </defs>
    <title>Loading</title>
    <ellipse class="ellipse ellipse1" cx="178.74" cy="166.5" rx="146.5" ry="164"/>
    <ellipse class="ellipse ellipse2" cx="178.74" cy="166.5" rx="164" ry="146.5" transform="translate(-59.3 111.68) rotate(-30)"/>
    <ellipse class="ellipse ellipse3" cx="178.74" cy="166.5" rx="146.5" ry="164" transform="translate(-54.82 238.05) rotate(-60)"/>
    <text class="text loading-text" x="89.68" y="178.49">Loading</text>
    <text class="text load-complete-text" transform="translate(0 183.28)">Load Complete!!</text>
</svg>
すると、こう表示されます。
「Load Complete!!」というtext要素に対して「display: none;」を追加しただけで消えましたね。
ではここからは一気に行きます。
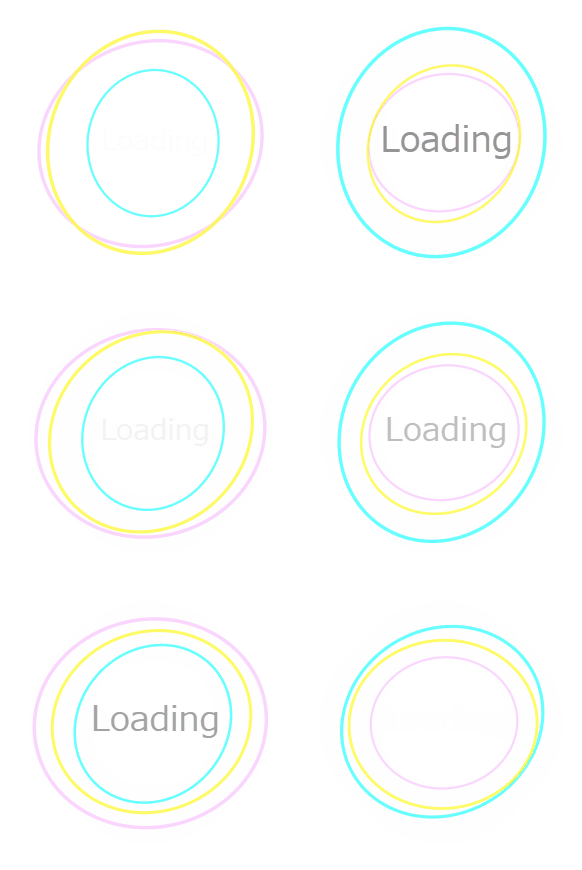
CSSを編集して、下記アニメーションを作成したいと思います。
- 楕円を回転させながら、拡大縮小する
- テキストをフェードイン・アウトさせながら、拡大縮小する
ちょっと長いコードになりますが、SVGの内容を下記のように書き換えて表示してみましょう!
<svg xmlns="http://www.w3.org/2000/svg" viewBox="0 0 352.74 333">
    <defs>
        <style>
            .ellipse {
                fill:none;
                stroke-miterlimit:10;
                stroke-width:5px;
                opacity:0.6;
            }
            .ellipse1 {
                stroke:aqua;
                animation: rotation 1.5s ease infinite;
                transform-origin: center center;
            }
            .ellipse2 {
                stroke:#f6bbff;
                animation: rotation 1.5s ease infinite;
                animation-delay: -0.4s;
                transform-origin: center center;
            }
            .ellipse3 {
                stroke:#fff900;
                animation: rotation 1.5s ease infinite;
                animation-delay: -0.8s;
                transform-origin: center center;
            }
            .text {
                font-size:48px;
            }
            .loading-text{
                fill:#939393;
                animation: loading-text 2s ease infinite;
                transform-origin: center center;
            }
            .load-complete-text{
                fill:#727272;
                display: none;
            }

            @keyframes rotation {
                0% {
                    transform: scale(0.6) rotate(0deg);
                }
                50% {
                    transform: scale(1.0) rotate(180deg);
                }
                100% {
                    transform: scale(0.6) rotate(360deg);
                }
            }
            @keyframes loading-text {
                0%,100% {
                    transform: scale(0.8);
                    opacity: 0;
                }
                50% {
                    transform: scale(1.0);
                    opacity: 1;
                }
            }
        </style>
    </defs>
    <title>Loading</title>
    <ellipse class="ellipse ellipse1" cx="178.74" cy="166.5" rx="146.5" ry="164"/>
    <ellipse class="ellipse ellipse2" cx="178.74" cy="166.5" rx="164" ry="146.5" transform="translate(-59.3 111.68) rotate(-30)"/>
    <ellipse class="ellipse ellipse3" cx="178.74" cy="166.5" rx="146.5" ry="164" transform="translate(-54.82 238.05) rotate(-60)"/>
    <text class="text loading-text" x="89.68" y="178.49">Loading</text>
    <text class="text load-complete-text" transform="translate(0 183.28)">Load Complete!!</text>
</svg>
CSSが使用できるので、アニメーションも簡単に作成出来ちゃいますね!
これでローディングアニメーションのいっちょ上がりです!
SVG画像にjavascriptを組み込んでみよう
さてさて、アニメーションの作成までできましたが、
これをこのまま使用すると、ただのアニメーション画像としてしか使用できません。
この辺をもう少しSVGならではの使い方にしていくために、javascriptを組み込んでいきたいと思います。
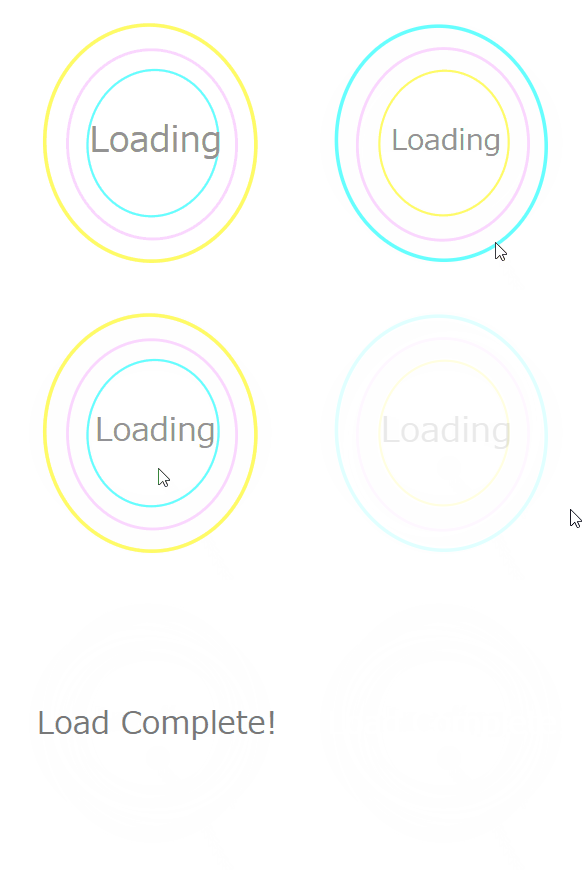
実装する機能は下記の二つです。
- ローディングアニメーションを開始する関数
- ロード完了アニメーションを開始して、最後は画像を非表示にする関数
今回はわかりやすくするために、SVG画像をクリックしたら、ローディングアニメーションとロード完了アニメーションを切り替えるような実装してみましょう。
SVG内にscriptタグを追加して、下記のようにしましょう。
<svg xmlns="http://www.w3.org/2000/svg" viewBox="0 0 352.74 333" id="loading_svg">
    <defs>
        <style>
            /* 通常スタイル */
            .ellipse {
                fill:none;
                stroke-miterlimit:10;
                stroke-width:5px;
                opacity:0.6;
            }
            .ellipse1 {
                stroke:aqua;
            }
            .ellipse2 {
                stroke:#f6bbff;
            }
            .ellipse3 {
                stroke:#fff900;
            }
            .text {
                font-size:48px;
            }
            .loading-text{
                fill:#939393;
            }
            .load-complete-text{
                fill:#727272;
                opacity: 0;
                transition: opacity 1s;
                transition-delay: .5s;
            }

            /* アニメーションスタイル */
            .loading-animation-ellipse {
                animation: rotation 1.5s ease infinite;
                transform-origin: center center;
                transition: opacity 1s;
            }
            .loading-animation-ellipse.ellipse2 {
                animation-delay: -0.4s;
            }
            .loading-animation-ellipse.ellipse3 {
                animation-delay: -0.8s;
            }
            .loading-animation-loading-text {
                animation: loading-text 2s ease infinite;
                transform-origin: center center;
                transition: opacity 1s;
            }

            .load-complete-animation-ellipse, .load-complete-animation-loading-text {
                opacity: 0;
            }
            .load-complete-animation-load-complete-text {
                opacity: 1;
                animation: load-complete-text .3s ease-in forwards, load-complete-text2 .5s linear forwards;
                animation-delay: .5s, 2.5s;
                transform-origin: center center;
            }

            /* キーフレーム */
            @keyframes rotation {
                0% {
                    transform: scale(0.6) rotate(0deg);
                }
                50% {
                    transform: scale(1.0) rotate(180deg);
                }
                100% {
                    transform: scale(0.6) rotate(360deg);
                }
            }
            @keyframes loading-text {
                0%,100% {
                    transform: scale(0.8);
                }
                50% {
                    transform: scale(1.0);
                }
            }
            @keyframes load-complete-text {
                from { transform: scale(0); }
                to { transform: scale(0.9); }
            }
            @keyframes load-complete-text2 {
                to { opacity: 0; }
            }

        </style>
    </defs>
    <title>Loading</title>
    <ellipse class="ellipse ellipse1" cx="178.74" cy="166.5" rx="146.5" ry="164"/>
    <ellipse class="ellipse ellipse2" cx="178.74" cy="166.5" rx="164" ry="146.5" transform="translate(-59.3 111.68) rotate(-30)"/>
    <ellipse class="ellipse ellipse3" cx="178.74" cy="166.5" rx="146.5" ry="164" transform="translate(-54.82 238.05) rotate(-60)"/>
    <text class="text loading-text" x="89.68" y="178.49">Loading</text>
    <text class="text load-complete-text" x="0" y="183.28" transform="scale(0)">Load Complete!!</text>
    <script><![CDATA[
        (function(){
            const ellipses = document.querySelectorAll(".ellipse");
            const loadingText = document.querySelector(".loading-text");
            const loadCompleteText = document.querySelector(".load-complete-text");

            // アニメーション切り替えメソッドを持つオブジェクト
            const animations = {
                startLoadingAnimation: () => {
                    ellipses.forEach((ellipse) => {
                        ellipse.classList.add("loading-animation-ellipse");
                        ellipse.classList.remove("load-complete-animation-ellipse");
                    });
                    loadingText.classList.add("loading-animation-loading-text");
                    loadingText.classList.remove("load-complete-animation-loading-text");
                    loadCompleteText.classList.remove("load-complete-animation-load-complete-text");
                },
                startLoadCompleteAnimation: () => {
                    ellipses.forEach((ellipse) => {
                        ellipse.classList.add("load-complete-animation-ellipse");
                    });
                    loadingText.classList.add("load-complete-animation-loading-text");
                    loadCompleteText.classList.add("load-complete-animation-load-complete-text");
                }
            };

            // init
            animations.startLoadingAnimation();

            // 仮で実装したクリックイベントの処理
            let status = true;
            document.getElementById('loading_svg').addEventListener('click', () => {
                if(status){
                    animations.startLoadCompleteAnimation();
                } else {
                    animations.startLoadingAnimation();
                }
                status = !status;
            });
        })();
    ]]></script>
</svg>
ちょっと長くなりましたが、追加したのは「ロード完了アニメーション」、ローディング⇔ロード完了を切り替える処理です。
animationsというオブジェクトのstartLoadingAnimationを実行するとローディングアニメーションが開始され、
startLoadCompleteAnimationを実行すると、ロード完了アニメーションが開始されます。
これを表示してクリックしてみるとこんな感じですね。
これで、SVGにjavascriptの組み込みまでできました!
※後にLoadingの文字が消えるアニメーションにしているので、フェードイン・アウトをしないようにしています。
補足:CDATAについて
SVG内はXML文書という扱いなので、>とか<、&はエスケープしないと使えません。
それを防ぐために
<style><![CDATA[
/* CSSの記載 */
]]></style>
<script><![CDATA[
/* JSの記載 */
]]></script>
こんな感じでで囲ってあげる必要があります。
こうしてあげることで、特にエスケープに気を使うことなくコーディングができます。
※逆にやらないとハマりポイントになりかねないので注意です!
HTMLからSVG画像に組み込んだ処理を呼び出そう
さて今の状態だと、実際に使用する場合、ロードが完了した時点でロード完了アニメーションを流すことができません。
これらの処理をhtmlから呼び出せるようにしてみましょう。
まずはSVGのjavascript部分を下記のように変更します。
※scriptタグ内部のみ記載します。
<script><![CDATA[
    (function(){
        const ellipses = document.querySelectorAll(".ellipse");
        const loadingText = document.querySelector(".loading-text");
        const loadCompleteText = document.querySelector(".load-complete-text");

        // アニメーション切り替えメソッドを持つオブジェクト
        const animations = {
            startLoadingAnimation: () => {
                ellipses.forEach((ellipse) => {
                    ellipse.classList.add("loading-animation-ellipse");
                    ellipse.classList.remove("load-complete-animation-ellipse");
                });
                loadingText.classList.add("loading-animation-loading-text");
                loadingText.classList.remove("load-complete-animation-loading-text");
                loadCompleteText.classList.remove("load-complete-animation-load-complete-text");
            },
            startLoadCompleteAnimation: () => {
                ellipses.forEach((ellipse) => {
                    ellipse.classList.add("load-complete-animation-ellipse");
                });
                loadingText.classList.add("load-complete-animation-loading-text");
                loadCompleteText.classList.add("load-complete-animation-load-complete-text");
            }
        };

        // init
        animations.startLoadingAnimation();

        // documentに突っ込む
        document.animations = animations;
    })();
]]></script>
先ほど作った、アニメーションを開始するメソッドを持つanimationsオブジェクトをSVGのdocumentに突っ込みます。
ここで突っ込んだdocumentはSVGのdocumentで、HTMLのdocumentとは別物なので
scopeやnamespaceは、htmlサイドと干渉することはありません。
SVGの編集が終わったら、次はhtmlを下記のようにしましょう。
<!DOCTYPE html>
<html>
<head>
    <meta charset="UTF-8">
    <title>SVGローディングアニメーション</title>
</head>
<body>
    <object id="loading" type="image/svg+xml" data="loading.svg" width="256" height="256"></object>
    <script>
        (function() {
            window.onload = function () {
                const loadingDoc = document.querySelector('#loading').contentDocument;
                loadingDoc.addEventListener('click', () => {
                    loadingDoc.animations.startLoadCompleteAnimation();
                });
            }
        })();
    </script>
</body>
</html>
この例では先ほどと同様に、クリックしたら完了アニメーションが流れるようにしていますが、
本来なら読み込み開始のタイミングでloadingDoc.animations.startLoadingAnimation();を実行し、
読み込みが完了したタイミングでloadingDoc.animations.startLoadCompleteAnimation();を実行する形になると思います。
これで、SVGにアニメーションの機能を持たせつつ、HTMLからそれを実行する処理が出来ました!
※うまく動かない方へ
恐らく「コピーしてやってるんですが、動かないんですけど。。。」という方がいらっしゃると思います。
上手くいかない方は以下のことを試してみて下さい。
対応ブラウザ
objectタグ自体はほとんどのサポートされていますが、javascriptを埋め込んで使うと使用できない場合があります。
chromeやFirefox、safariなどのモダンなブラウザでは動作しますが、IE11では動作しませんでした。
fileアクセスの問題
今回のコピーしたコードをhtmlとsvgで保存して、htmlをローカルで開くと、URLが「file://~~~」となると思うのですが、
これだと、document.querySelector('#loading').contentDocument; の部分でSVGのdocumentが取得できず、動作しません。
セキュリティ上の理由でローカルファイルから、別のローカルファイル等を読み込めないようになっているためです。
この問題を解決するには、ブラウザの設定を変更するか、
ローカルにWEBサーバーを立てて、「http://~~~」でhtmlで開くかすれば、正しくSVGのDocumentが取得できるようになります。
設定の変更方法はブラウザによって違いますが、「ローカルhtml 外部ファイルアクセス」などで検索すれば出てくると思います。
ただし、ローカルファイルの実行を許可する設定は非常に危険なので、設定を変更した場合は必ず元に戻してください!!
WEBサーバーを立てるやり方を推奨します。
まとめ
SVG画像を読み込むだけで、既に複数のアニメーションを持った画像を使用できるというのは、結構汎用性が高い使い方なんじゃないかなと思います。
IEの事を考えるとまだ実用的な使い方ではないのですが、頭に片隅に置いておくといいと思います。


