
Alexaのカスタムスキルを作成してみよう
こんにちは、開発のきくちです。
今回は Alexa のカスタムスキルを作成してバイオリズムを読み上げてもらおうと思います。
Alexa においてスキルとは様々な命令(アラーム、音楽再生、ニュース読み上げ等)の事で、
独自にスキルを開発することが可能です。ユーザーが独自に開発したスキルをカスタムスキルと呼びます。
実機が無くても JavaScript の知識があればブラウザ上でとても簡単に開発からテストまでできます。
バイオリズムとは
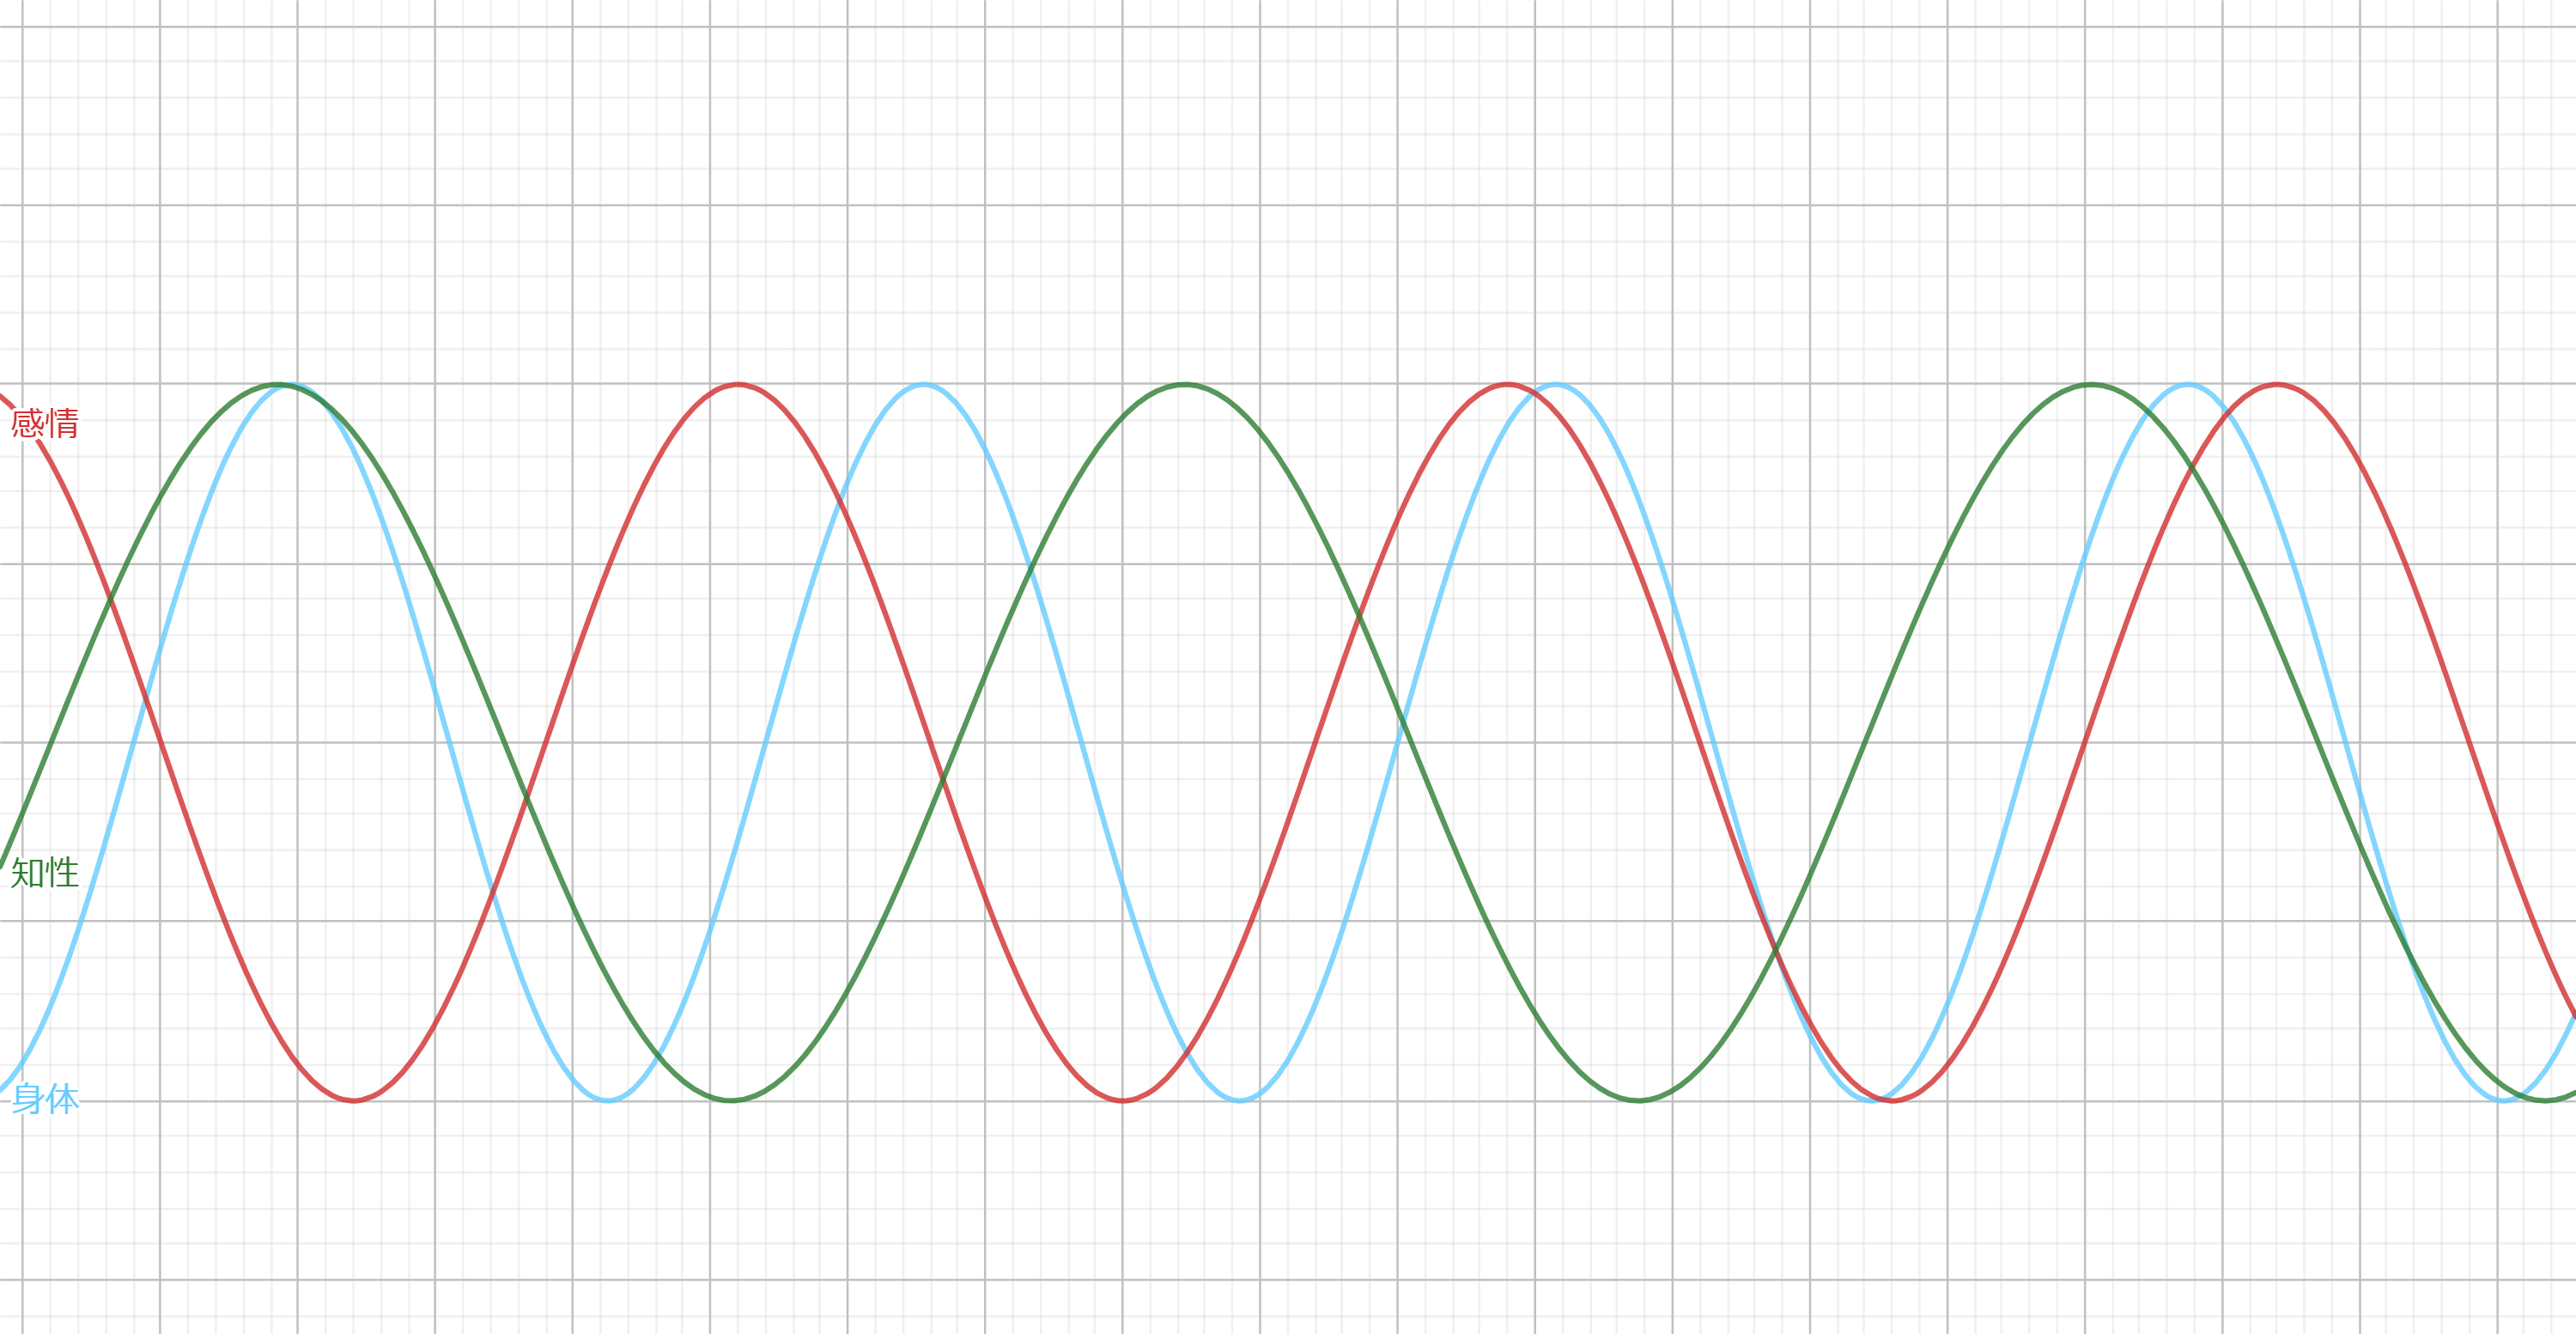
バイオリズムとは心身の状態を身体、感情、知性の3種類で表しています。
生年月日から身体は23日、 感情は28日、知性は33日の周期を持ち、正弦波(サインカーブ)で表現され、
プラスとマイナスが入れ替わる日が注意日とされているようです。
本来なら1から-1の値を取るのですが、聞き取りやすいように100から-100の値にしたいと思います。
最終的なイメージ
初回起動時には誕生日を答えてもらい、S3 に保存します。
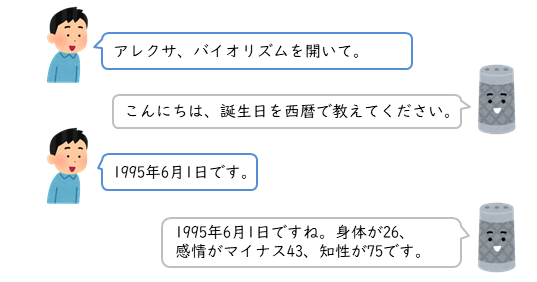
2回目以降は保存した誕生日を読み込んで使用します。

開発者アカウントの作成
開発者アカウントを作成していない場合は 開発者ポータル から作成します。
登録や年会費は一切無料で作成できます。
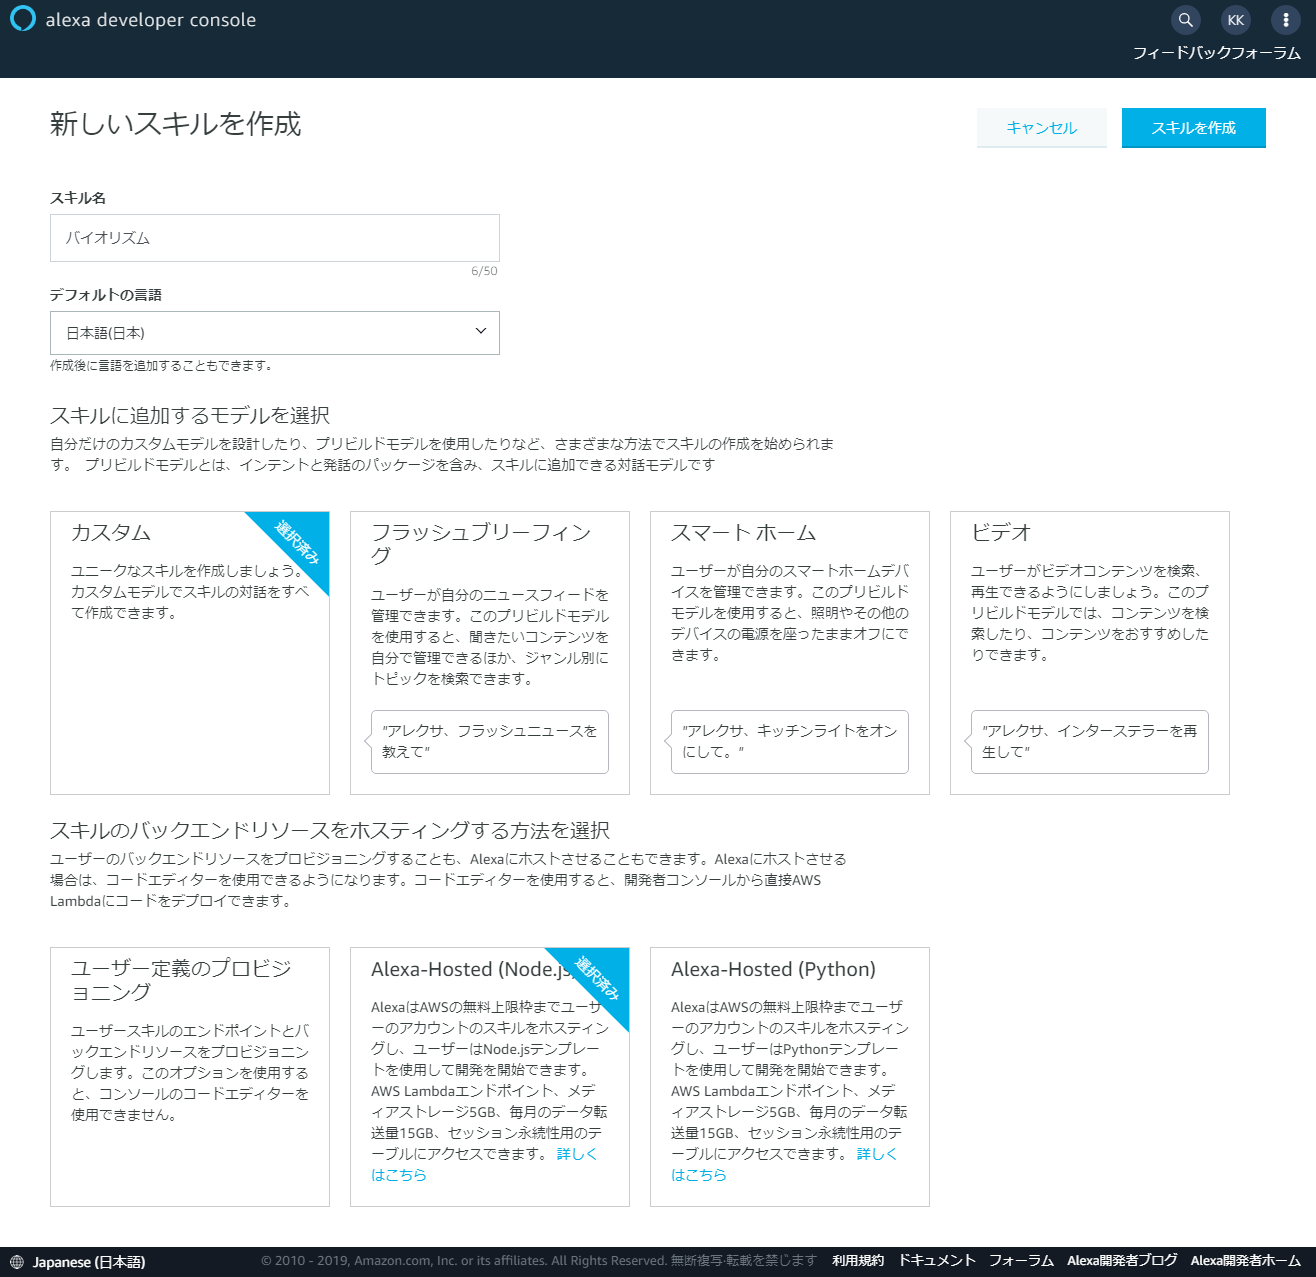
スキルの新規作成
alexa developer console にアクセスしてスキルの作成ボタンを押します。
スキル名:バイオリズム
スキルに追加するモデルを選択:カスタム
スキルのバックエンドリソースをホスティングする方法を選択:Alexa-Hosted(Node.js)
をそれぞれ選択してスキルを作成ボタンを押します。作成するまで数分かかります。
スキルのテスト
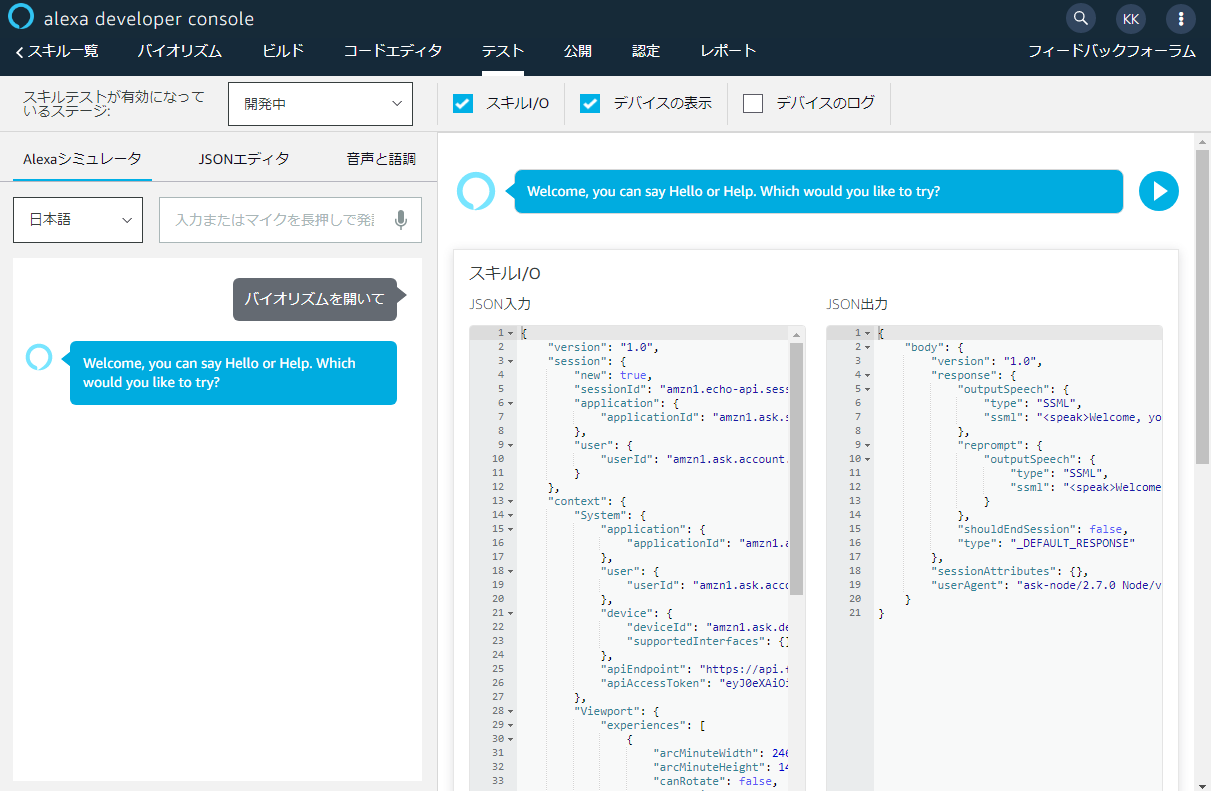
スキルの作成が終わったらテストしてみましょう。テストタブに移動すると
「このスキルでは、テストは無効になっています」と表示されるのでセレクトボックスから「非公開」を「開発中」に変更します。
左のテキストボックスに「バイオリズムを開いて」と入力してエンターキーを押します。
「Welcome, you can say Hello or Help. Which would you like to try?」と返ってくるのが確認できます。
応答メッセージの変更
スキルの作成が確認できたところでこれから開発していきましょう。
まず最初に応答するメッセージを変更します。コードエディタタブに移動して index.js の11行目を以下のように変更します。
const speakOutput = 'こんにちは、誕生日を西暦で教えてください';修正内容を反映させるには上部にある「保存」「デプロイ」ボタンを押します。
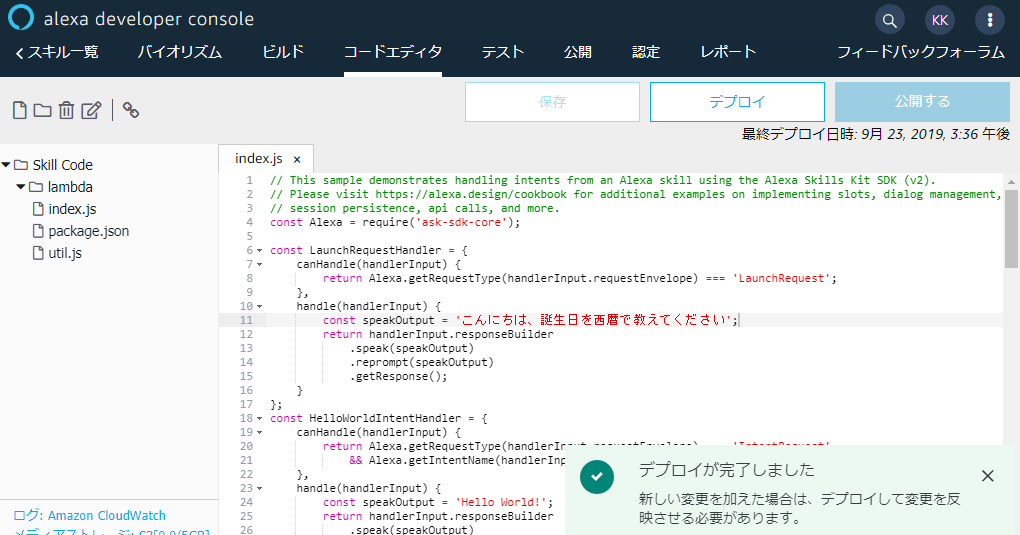
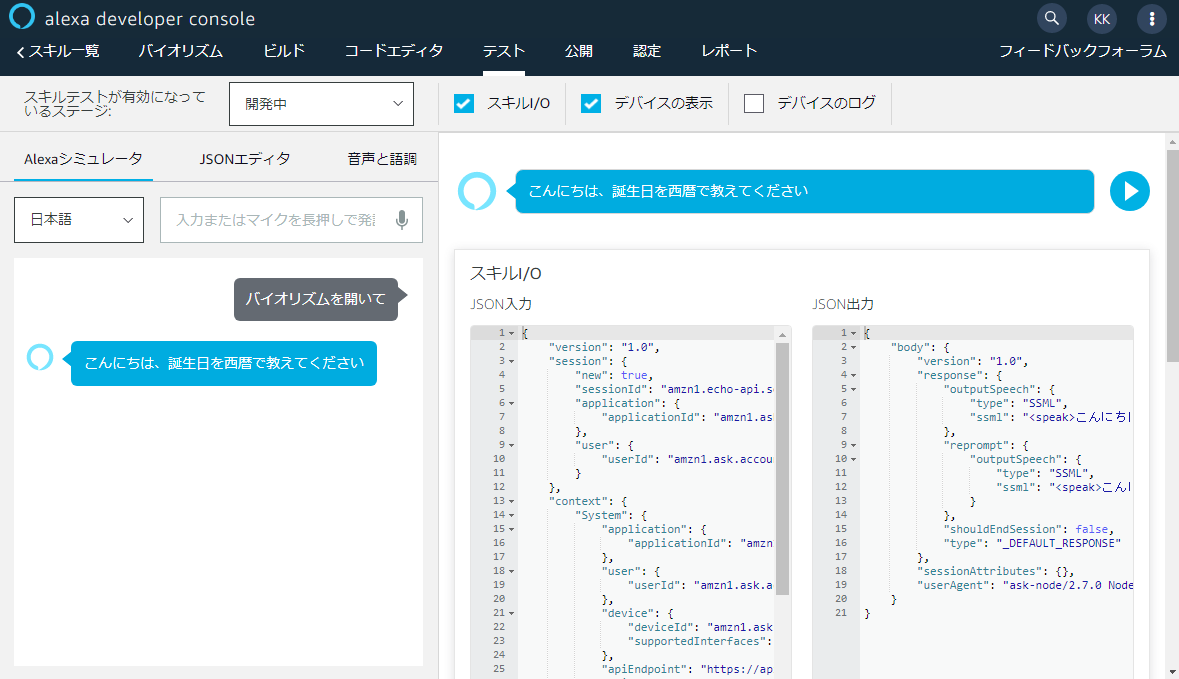
デプロイが完了したら再びテストタブに移動して応答メッセージが変わっているのを確認してみましょう。
質問に応答する
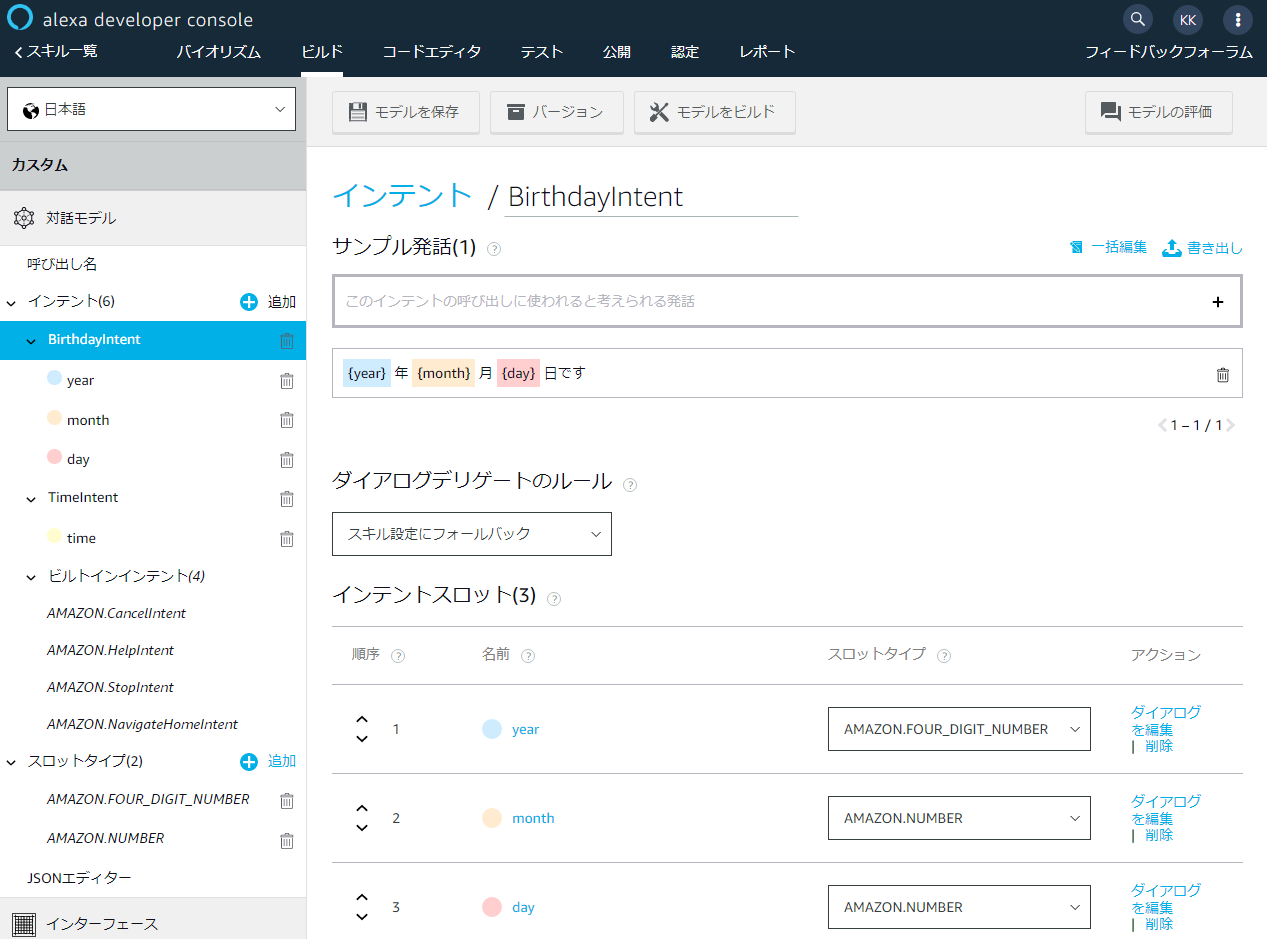
質問に応答するにはインテントという機能を使用します。ビルドタブからインテントの追加を押し
BirthdayIntent と入力してカスタムインテントを作成ボタンを押します。
このインテントの呼び出しに使われると考える発話に{year} 年 {month} 月 {day} 日ですと入力して、
インテントスロットに AMAZON.FOUR_DIGIT_NUMBER, AMAZON.NUMBER, AMAZON.NUMBER を設定します。
そうすると返答した場合に year, month, day それぞれ自動的に値が入るようになります。
設定後、上部にある「モデルを保存」「モデルをビルド」ボタンを押します。
続いてインテントに対するハンドラーを index.js に作成します。
ハンドラーには canHandle() とhandle() の2つのメソッドを作成する必要があり、 canHandle() の戻り値が true の場合に handle() が実行されます。
const BirthdayIntentHandler = {
    canHandle(handlerInput) {
        return Alexa.getRequestType(handlerInput.requestEnvelope) === 'IntentRequest'
            && Alexa.getIntentName(handlerInput.requestEnvelope) === 'BirthdayIntent';
    },
    async handle(handlerInput) {
        const year = handlerInput.requestEnvelope.request.intent.slots.year.value;
        const month = handlerInput.requestEnvelope.request.intent.slots.month.value;
        const day = handlerInput.requestEnvelope.request.intent.slots.day.value;
        const now = new Date();
        const d1 = new Date(now.getFullYear(), now.getMonth(), now.getDate());
        const d2 = new Date(`${year}-${month}-${day}`);
        const diff = (d1 - d2) / 86400000;
        const {physical, emotional, intellectual} = getBiorhythm(diff);
        const speakOutput = `${year}年${month}月${day}日ですね。身体が${physical}、感情が${emotional}、知性が${intellectual}です`;
        return handlerInput.responseBuilder
            .speak(speakOutput)
            .getResponse();
    }
};
作成した BirthdayIntentHandler を登録します。下の方にある exports.handler の .addRequestHandlers() に追加します。
    .addRequestHandlers(
        LaunchRequestHandler,
        BirthdayIntentHandler,
        HelpIntentHandler,
        CancelAndStopIntentHandler,
        SessionEndedRequestHandler,
        IntentReflectorHandler, // make sure IntentReflectorHandler is last so it doesn't override your custom intent handlers
    )
バイオリズムを計算する関数も追加します。身体であれば計算式は

になります。
const getBiorhythm = function(diff) {
    const b1 = parseInt(Math.sin((2 * Math.PI * diff) / 23) * 10000) / 10000;
    const b2 = parseInt(Math.sin((2 * Math.PI * diff) / 28) * 10000) / 10000;
    const b3 = parseInt(Math.sin((2 * Math.PI * diff) / 33) * 10000) / 10000;
    return {
        physical: Math.floor(100 * b1),
        emotional: Math.floor(100 * b2),
        intellectual: Math.floor(100 * b3)
    }
}
これでバイオリズムを読み上げてくれるようになりました。デプロイしてテストしてみましょう。
数字をキーボードから入力する場合は漢数字で入力する必要があります。

永続化する
最後に BirthdayIntentHandler から取得した誕生日を S3 に永続化して2回目以降は聞かないような処理を加えます。
S3 を使用するにはまず package.json の dependencies に ask-sdk-s3-persistence-adapter を追加します。
  "dependencies": {
    "ask-sdk-core": "^2.6.0",
    "ask-sdk-model": "^1.18.0",
    "aws-sdk": "^2.326.0",
    "ask-sdk-s3-persistence-adapter": "^2.0.0"
  }
次に index.js の先頭にアダプターを使用するための変数を用意します。
const persistenceAdapter = require('ask-sdk-s3-persistence-adapter');S3 に保存する処理を BirthdayIntentHandler に追加します。
const BirthdayIntentHandler = {
    canHandle(handlerInput) {
        return Alexa.getRequestType(handlerInput.requestEnvelope) === 'IntentRequest'
            && Alexa.getIntentName(handlerInput.requestEnvelope) === 'BirthdayIntent';
    },
    async handle(handlerInput) {
        const year = handlerInput.requestEnvelope.request.intent.slots.year.value;
        const month = handlerInput.requestEnvelope.request.intent.slots.month.value;
        const day = handlerInput.requestEnvelope.request.intent.slots.day.value;
        // ------------- 追加分ここから ------------------
        const attributesManager = handlerInput.attributesManager;
        const birthdayAttributes = {
            "year" : year,
            "month" : month,
            "day" : day
        };
        attributesManager.setPersistentAttributes(birthdayAttributes);
        await attributesManager.savePersistentAttributes();
        // ------------- 追加分ここまで ------------------
        const now = new Date();
        const d1 = new Date(now.getFullYear(), now.getMonth(), now.getDate());
        const d2 = new Date(`${year}-${month}-${day}`);
        const diff = (d1 - d2) / 86400000;
        const {physical, emotional, intellectual} = getBiorhythm(diff);
        const speakOutput = `${year}年${month}月${day}日ですね。身体が${physical}、感情が${emotional}、知性が${intellectual}です`;
        return handlerInput.responseBuilder
            .speak(speakOutput)
            .getResponse();
    }
};
インテントが呼ばれる前処理としてインターセプターという機能があるので、インターセプターで永続化情報を取得します。
const LoadBirthdayInterceptor = {
   async process(handlerInput) {
        const attributesManager = handlerInput.attributesManager;
        const sessionAttributes = await attributesManager.getPersistentAttributes() || {};
        const year = sessionAttributes.hasOwnProperty('year') ? sessionAttributes.year : 0;
        const month = sessionAttributes.hasOwnProperty('month') ? sessionAttributes.month : 0;
        const day = sessionAttributes.hasOwnProperty('day') ? sessionAttributes.day : 0;
        if (year && month && day) {
           attributesManager.setSessionAttributes(sessionAttributes);
        }
    }
};
永続化情報があればバイオリズムを読み上げるハンドラーを追加します。
const HasBirthdayLaunchRequestHandler = {
canHandle(handlerInput) {
const attributesManager = handlerInput.attributesManager;
const sessionAttributes = attributesManager.getSessionAttributes() || {};
const year = sessionAttributes.hasOwnProperty('year') ? sessionAttributes.year : 0;
const month = sessionAttributes.hasOwnProperty('month') ? sessionAttributes.month : 0;
const day = sessionAttributes.hasOwnProperty('day') ? sessionAttributes.day : 0;
return handlerInput.requestEnvelope.request.type === 'LaunchRequest' &&
year && month && day;
},
handle(handlerInput) {
const attributesManager = handlerInput.attributesManager;
const sessionAttributes = attributesManager.getSessionAttributes() || {};
const year = sessionAttributes.hasOwnProperty('year') ? sessionAttributes.year : 0;
const month = sessionAttributes.hasOwnProperty('month') ? sessionAttributes.month : 0;
const day = sessionAttributes.hasOwnProperty('day') ? sessionAttributes.day : 0;
const now = new Date();
const d1 = new Date(now.getFullYear(), now.getMonth(), now.getDate());
const d2 = new Date(`${year}-${month}-${day}`);
const diff = (d1 - d2) / 86400000;
const {physical, emotional, intellectual} = getBiorhythm(diff);
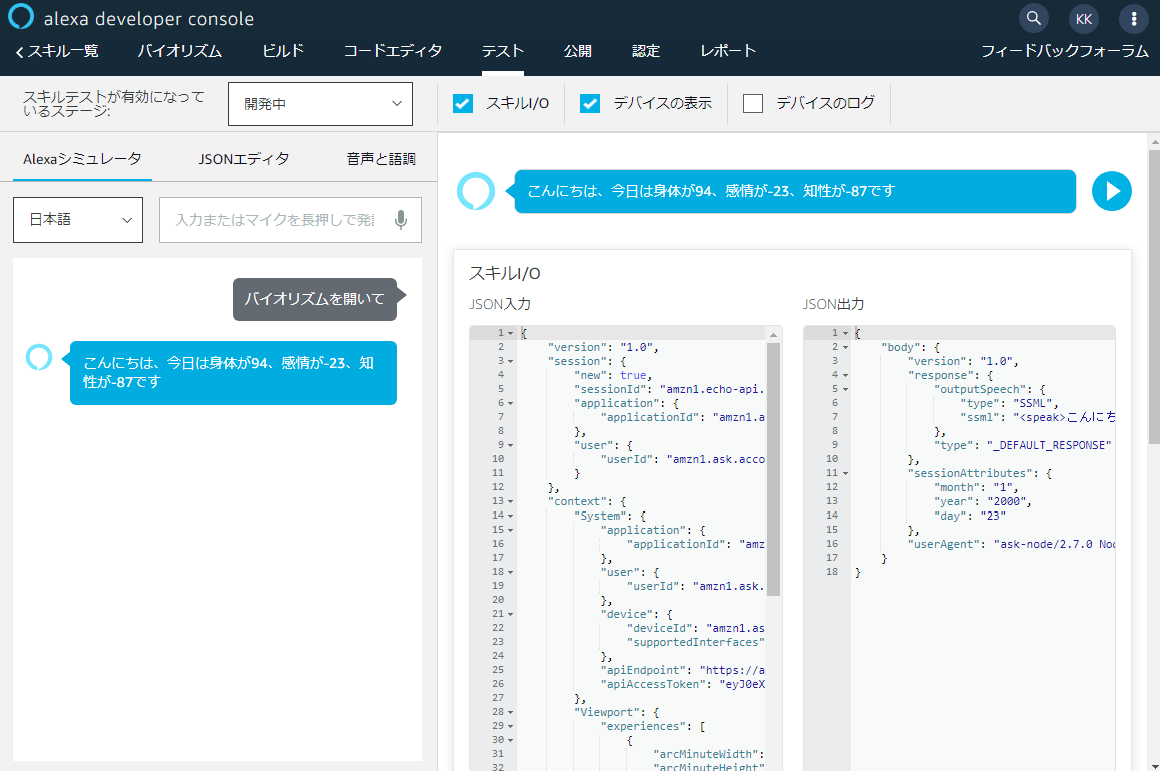
const speechText = `こんにちは、今日は身体が${physical}、感情が${emotional}、知性が${intellectual}です`;
return handlerInput.responseBuilder
.speak(speechText)
.getResponse();
}
};最後に S3 のアダプターと作成したインターセプターとハンドラーを登録します。
永続化情報があれば HasBirthdayLaunchRequestHandler が、なければ LaunchRequestHandler が呼び出される仕組みです。
exports.handler = Alexa.SkillBuilders.custom()
    .withPersistenceAdapter(
        new persistenceAdapter.S3PersistenceAdapter({bucketName:process.env.S3_PERSISTENCE_BUCKET})
    )
    .addRequestHandlers(
        HasBirthdayLaunchRequestHandler,
        LaunchRequestHandler,
        BirthdayIntentHandler,
        HelpIntentHandler,
        CancelAndStopIntentHandler,
        SessionEndedRequestHandler,
        IntentReflectorHandler, // make sure IntentReflectorHandler is last so it doesn't override your custom intent handlers
    )
    .addRequestInterceptors(
        LoadBirthdayInterceptor
    )
    .addErrorHandlers(
        ErrorHandler,
    )
    .lambda();
それではデプロイして実行してみましょう。2回目以降は誕生日を聞かれないことが確認できます。
最後に
要点のみの説明でしたが Alexa のカスタムスキル開発の流れをなんとなく掴めたのではないでしょうか?
今回使用したサンプルはこちらからダウンロードできます。ご活用頂ければ幸いです。